This blog post provides an overview of how to connect an Ascom i63 Wi-Fi phone to Microsoft Teams. The Ascom i63 device is a Wi-Fi device and supports native SIP connections to PBX Systems. As the Ascom i63 is certified for Microsoft Teams, a Teams administrator can use the Microsoft Teams SIP Gateway to connect the i63 to Microsoft Teams.
Read more: How to connect an Ascom i63 Wi-Fi phone to Microsoft TeamsThe Ascom 63i device
The Ascom i63 is a robust, enterprise-grade Voice over Wi-Fi (VoWiFi) handset designed for seamless mobile communication in demanding environments. Available in three models—Talker, Messenger, and Protector—it caters to varying needs from basic telephony to advanced messaging and personal safety features.
The Protector model adds safety features like man-down, no-movement alarms, and automatic emergency calls, making it ideal for high-risk work environments.
All three models are compatible with the Microsoft Teams SIP gateway. Additional Ascom software is required to use the built-in messenger service for internal communication or the alarming feature.
To ensure optimal performance, Ascom provides Over-The-Air (OTA) updates and validated interoperability with major PBX and Wi-Fi vendors.
Since early 2023, the Ascom i63 has supported Microsoft Teams integration via the Teams SIP Gateway, enabling seamless Teams calling functionality on the device. This certification allows organizations to extend their Teams telephony environment to the i63 handset, combining the reliability of Ascom’s enterprise-grade VoWiFi communication with the flexibility of Microsoft’s collaboration platform.
Prerequisites for connecting the Ascom i63 to Microsoft Teams
To connect the Ascom i63 to Microsoft Teams, the Teams administrator needs to prepare the Wi-Fi phone for Microsoft Teams. The phone requires, of course, a connection to the Wi-Fi network, a current date and time, and at least firmware version 5.0.1. Additionally, the Microsoft Teams profile must be enabled to proceed with the next configuration steps.
For the configuration, Ascom requires a USB-connected docking station and the Ascom configuration software WinPDM. Unfortunately, this software requires a Java client instance to be installed on the PC. The Teams administrator can request the WinPDM software from Ascom.
Configuration of the Ascom i63 for the Microsoft Teams platform
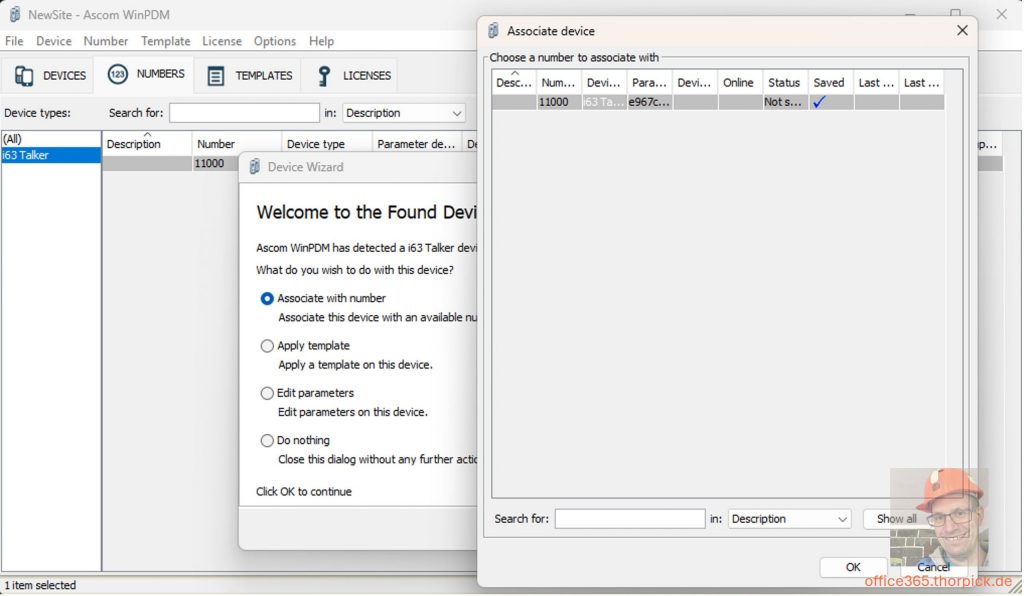
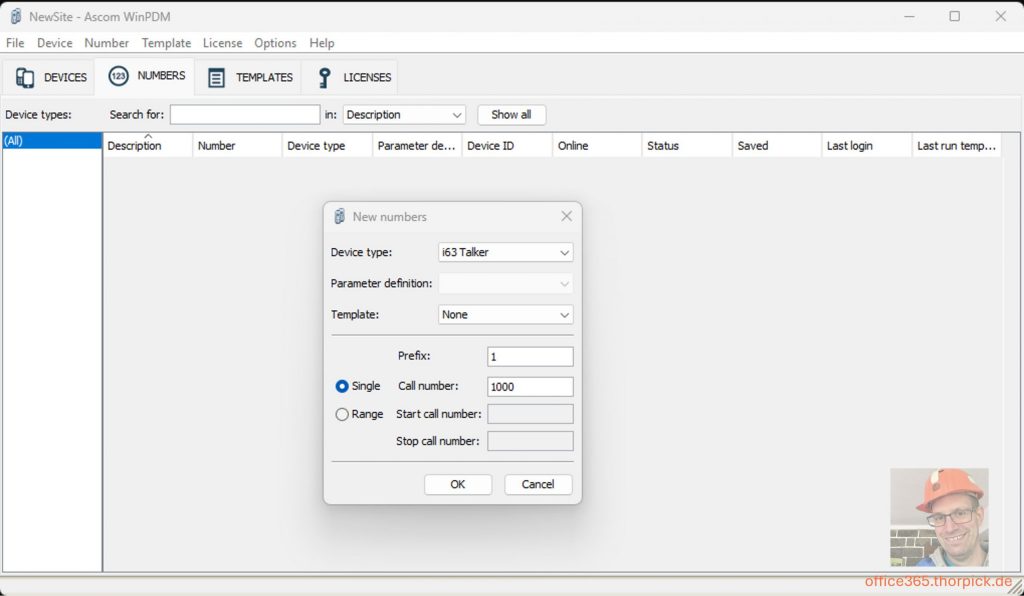
The first step in the Ascom provisioning software is to add a new number in the ‘Numbers’ tab. The number will be assigned to the device and used for setting the required configuration parameters. The number is more or less only an asset and inventory ‘number’ when the i63 device uses Teams as a PBX platform. All relevant user information, such as phone number and display name, is obtained from Teams when the phone is registered with Teams.
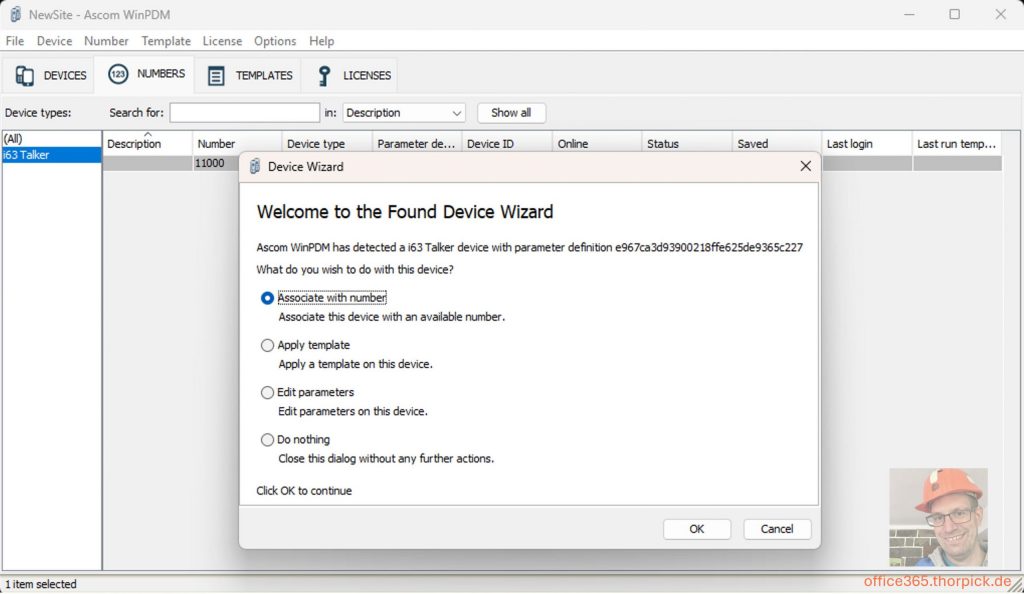
When connecting the device for the first time, the provisioning software prompts to import the device into the provisioning software. During this process, the administrator can assign a number to the device and with it a configuration. When this is done, the i63 device can be configured to work with Microsoft Teams.
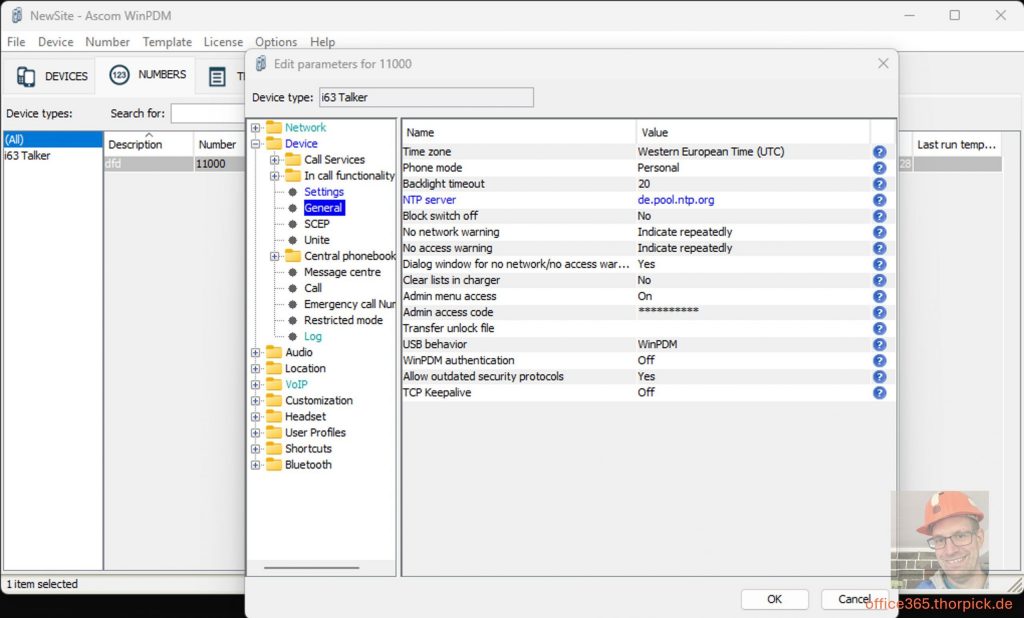
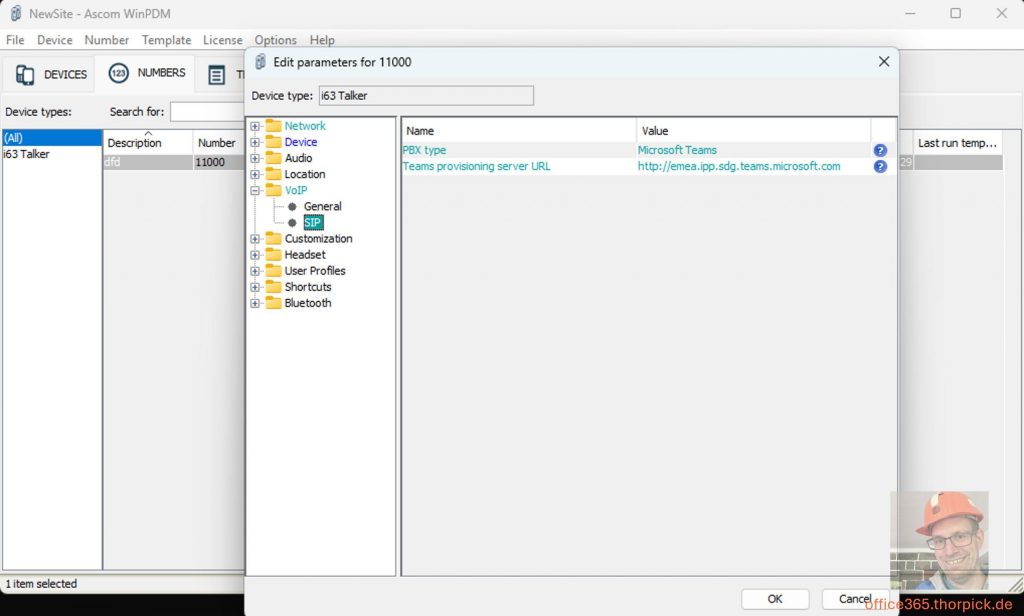
The configuration requires the following parameters and values:
| Name/Section | Parameter | Value | Comment/Description |
| Network -> General | Auto-switch network | on | Enable/disable auto network switching. |
| Network -> Network A | Define the WLAN settings | depends on your WI-FI network | Connect the Ascom device to your Wi-Fi network |
| Device -> General | Time Zone | depends on your location, for example, Western European Time | |
| Device -> General | NTP Server | IP address or FQDN of a valid time server | |
| VoIP -> SIP | PBX Type | Microsoft Teams | Enables Microsoft Teams Mode |
| VoIP -> SIP | Teams provisioning server URL | depends on your location, for example, http://emea.ipp.sdg.teams.microsoft.com for Europe | Refer to the official Microsoft Learn article about Teams SIP Gateway deployment |
Connecting to Microsoft Teams
After successful configuration, the Teams administrator provisions the device to the Teams platform by opening the Teams Admin Center, navigating to the Teams Devices section, and selecting ‘SIP devices’.
To initiate the provisioning process, the administrator clicks on the ‘Actions’ menu in the top-right corner and selects ‘Provision devices’. Here, the admin can add a new device by entering the MAC address of the Ascom device and a name for the device.
The MAC address of the handset is accessible via the device’s Status page by navigating through Menu > Settings > Device Info > Hardware > MAC Wi-Fi.
Once the initial configuration is complete, the Teams administrator can initiate device provisioning directly on the handset. The admin finds a “Teams” option on the phone’s display in the lower right corner. The phone generates a SIP device login code when the admin presses the Teams button on the phone.
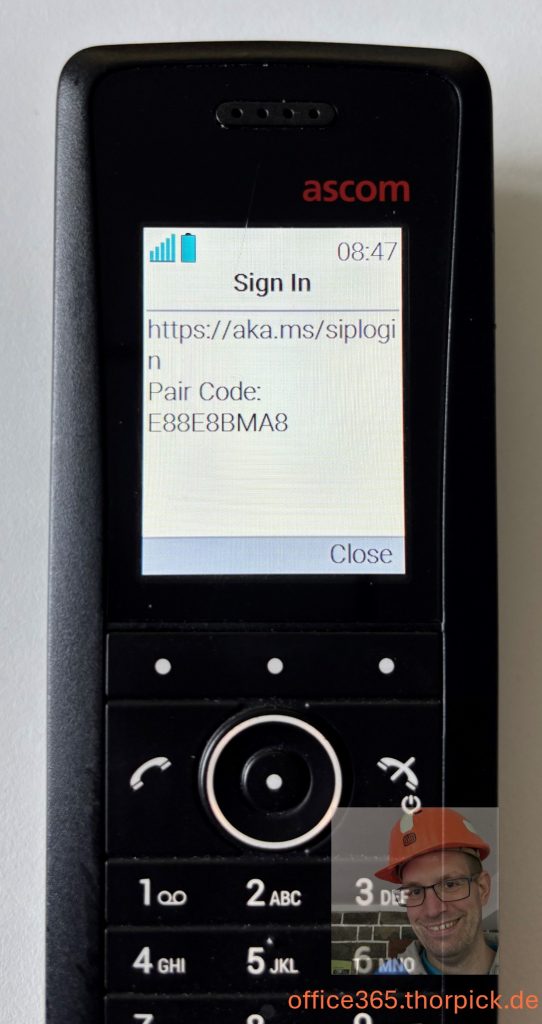
The user can use the displayed SIP device code and log in as described in one of my other articles about SIP Devices in Microsoft Teams environments.
Functions of the Ascom Wi-Fi device connected to Microsoft Teams
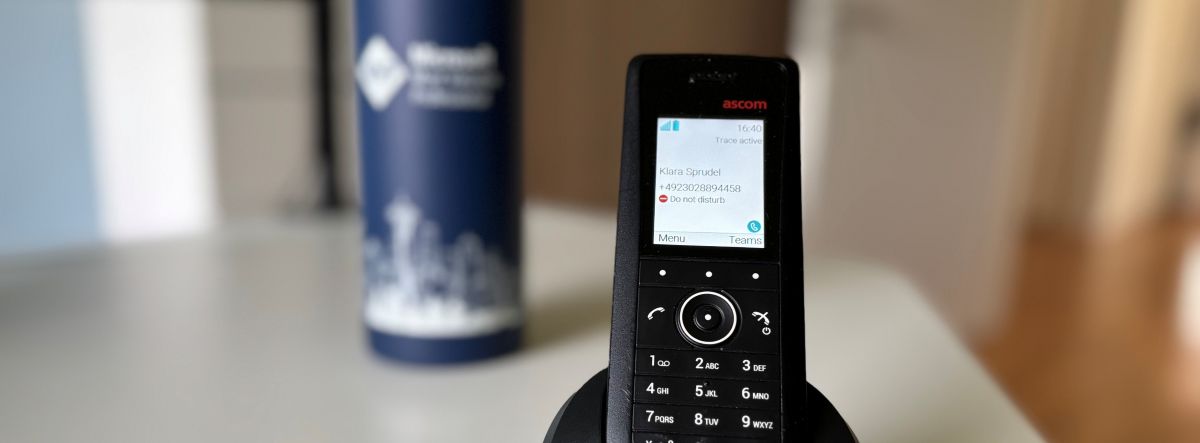
When the Ascom Wi-Fi phone is successfully connected to the Microsoft Teams SIP gateway and it is registered with a Teams user account, it displays the user’s display name and phone number.
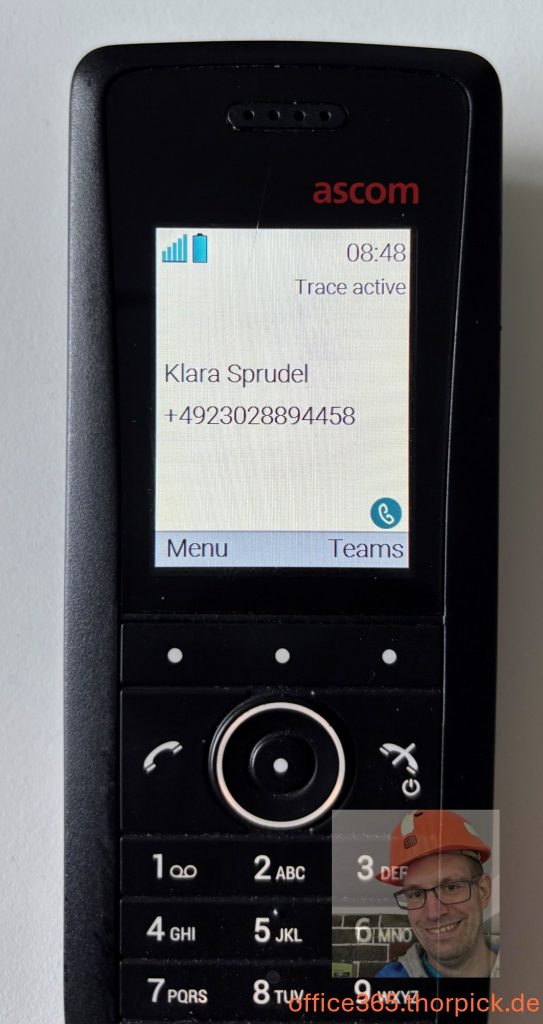
The user can now initiate new Teams calls by entering a phone number. If the user has a Teams dial plan assigned, it is applied to the call in the platform. The user won’t see the normalized phone number on the Ascom i63’s display.
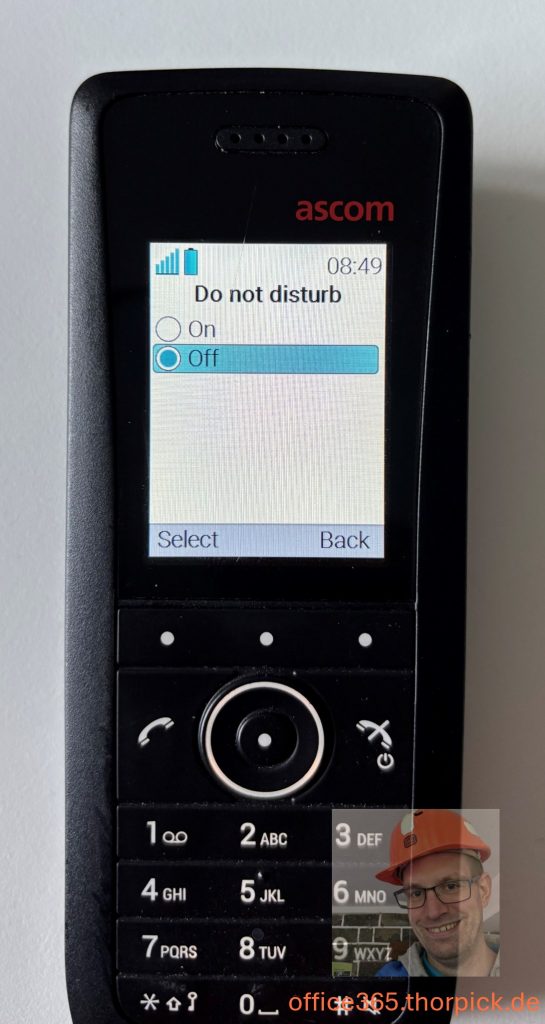
Additionally, the phone allows users to change their presence state to ‘Do not disturb’. After enabling the DND mode, it takes a moment till the presence state changes to DND on the i63 phone.
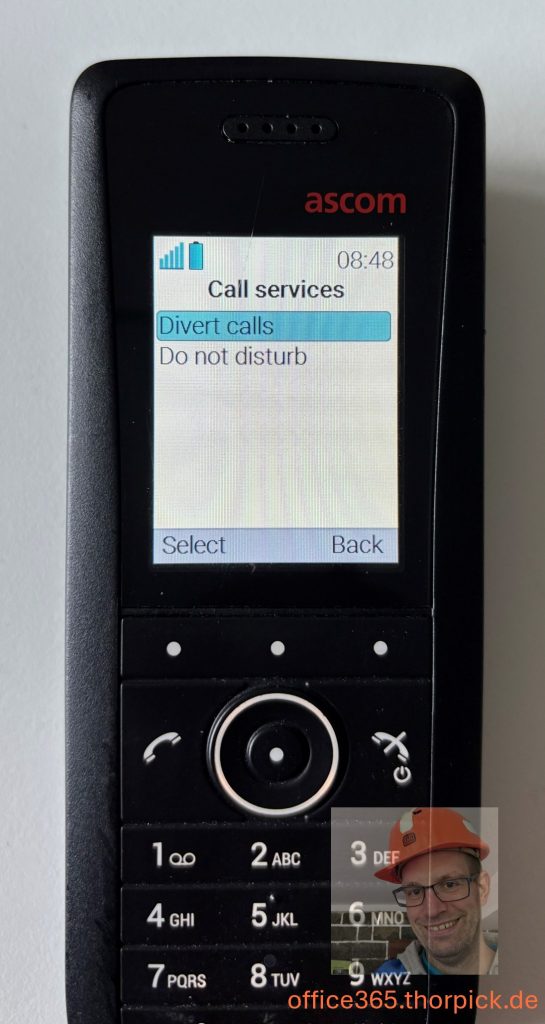
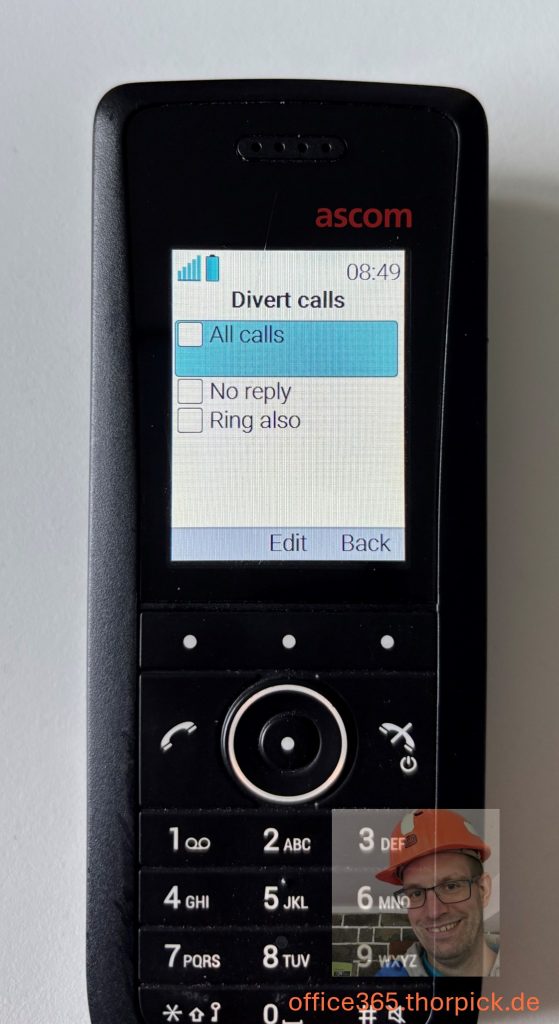
Or a user can configure direct call forwarding. The user can access both features by pressing the Teams button located in the lower-right corner.
Mass enrollment and management of the Ascom phones
I asked Ascom about options for an initial mass deployment of the required Teams settings and management of the phones. Imagine a company orders 20, 30, or even hundreds of these devices. No administrator would like to configure each single device manually, even though using a template would already optimize the process. Ascom replied to me that the devices are coming with a pre-configured Wi-Fi network, which can be used for the enrollment of the devices. The administrator can configure specific DHCP values with an IP address for a deployment server, and the phone would automatically start self-provisioning. So that the phones are automatically provisioned with the correct time zone, NTP server, and Teams enabled.
Additionally, the management software can update parameters in the phone after enrollment.
Summary
The Ascom i63 Wi-Fi phone is a great alternative if a company requires wireless, mobile phones in their Teams Phone deployment. It allows a user to register the phone as an additional Microsoft Teams device, enabling them to stay connected while moving on campus or within a building.
Of course, my lab environment is far away from a real-world customer environment. So, I can say nothing about Wi-Fi coverage, roaming between Wi-Fi antennas, and how it works with an ongoing Teams call. I can report that one of my customers has informed me that it works fine, even when switching between different Wi-Fi access points. But Wi-Fi coverage is critical. If a user pushes to an area without Wi-Fi coverage on campus, their phone loses connection, and Teams attempts to reconnect.
In general, the Teams provisioning process is straightforward and works smoothly when an administrator prepares the network and has completed the necessary Microsoft Teams setup.
Links
i63 VoWiFi and DECT phone | Ascom
How to connect Spectralink IP DECT system with Microsoft Teams | Office 365 Blog
How to connect the Poly Rove IP DECT system to the Microsoft Teams SIP gateway | Office 365 Blog